How to take a high-quality picture for remote services
As part of your treatment at FSHS, you might be requested to photograph some of your symptoms and to send copies of them to care staff. Follow these instructions if you need to take a suitable, sufficiently sharp image for remote services.
Please note that you can only send photographs related to your care via the YTHSDigi service. Never send them as email attachments or through some other communications channel.
All photos
Once you’ve taken a photo, zoom in. Check that the image is clear and sharp. If it appears blurred, take a new photo. If you’re taking a photo of a small object such as a mole, marking it with a marker pen can help you to focus the camera.
Take photos until you get a sharp image. Retain only good quality photos. Please note that providing sharp pictures makes it easier to find a solution to your query digitally.
Once you have good-quality photos, save them in JPEG or JPG format. Save or send the images to that device you intend to use to contact FSHS via a remote appointment or the Self chat. You should save the images on the device before contacting FSHS.
You can join your remote appointment 5 minutes before it begins and upload the photos in the appointment’s chat field in advance.
Skin lesion
To show the size of a lesion, place a ruler or tape measure next to it. This will also help you focus on the correct target (Image 1).
If the lesion is on your face, take a photo of it with your mobile phone in front of a mirror by turning the rear-facing camera towards you and by checking the alignment on the mobile phone screen via the mirror. Make sure the lighting is good for example in front of the bathroom mirror.
Take a close-up of the lesion as well as a wide shot of the area in question, such as a close-up of the skin lesion on your leg as well as a photo of the entire leg (Image 2).
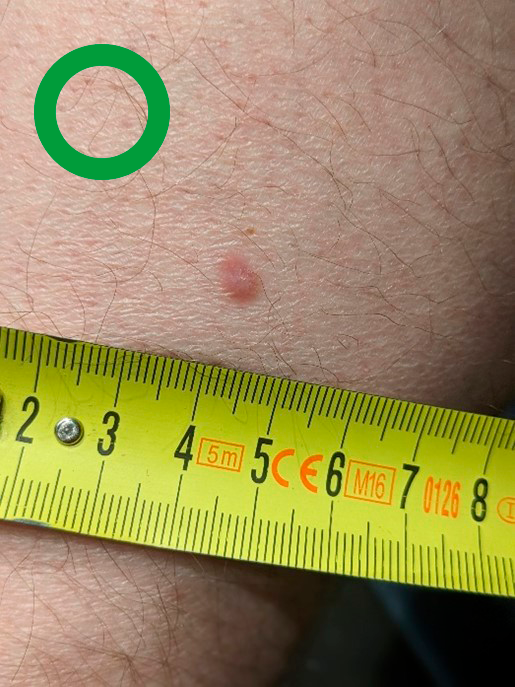
IMAGE 1 Skin lesion, focused image. Correct image: includes a tape measure and the object in focus.
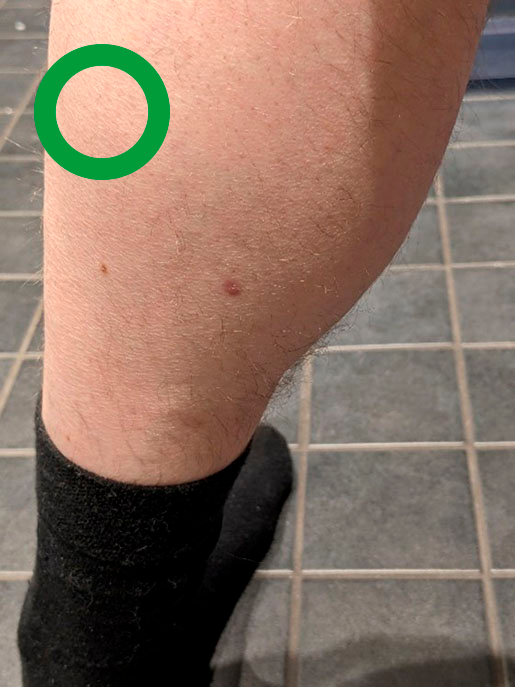
IMAGE 2 Skin lesion, wide shot. Correct image: wide shot, location easy to detect.
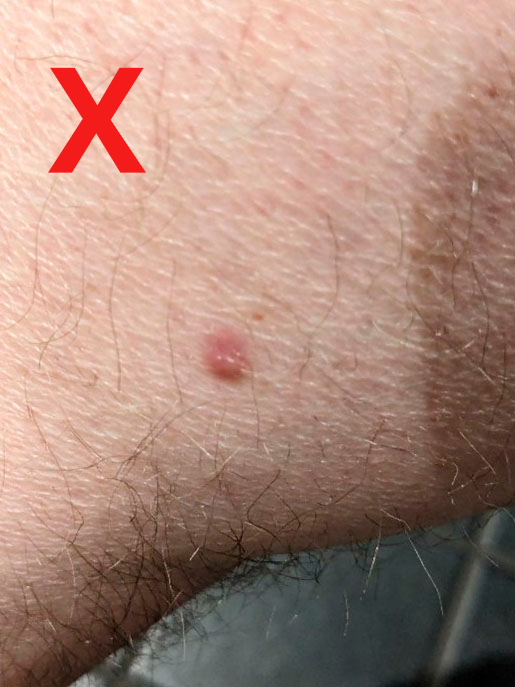
IMAGE 3 Incorrect image: focus on body hair.
Eye
If you’re taking a photo of an inflamed eye, pull the lower eyelid slightly downwards so that the reddish, inflamed conjunctiva under the lid can be clearly seen (Image 6). Take a photo of your healthy eye for comparison as well as a wide shot of both of your eyes (Image 7). Use the rear-facing camera of your mobile phone.

IMAGE 4 Incorrect image: blurry, structures of the eye not visible.
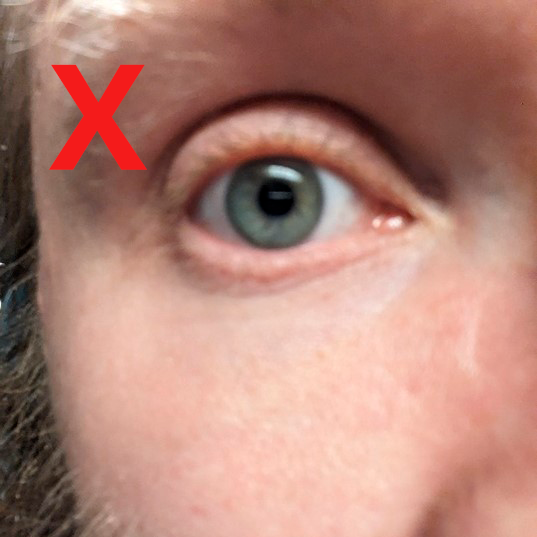
IMAGE 5 Incorrect image: the picture is blurry, focus is not on the eye.
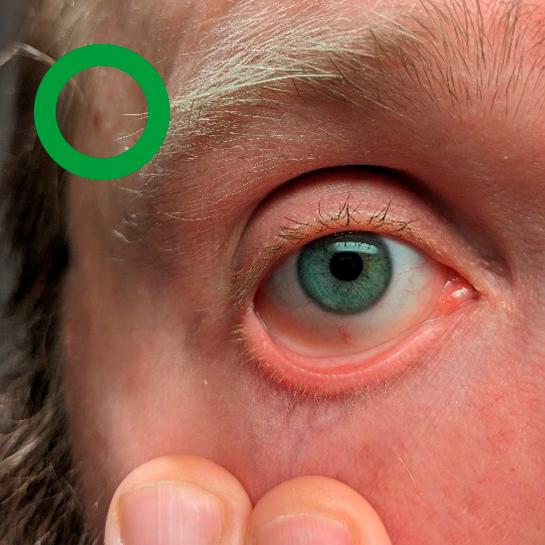
IMAGE 6 Correct image: sharp image, lower eyelid is visible.
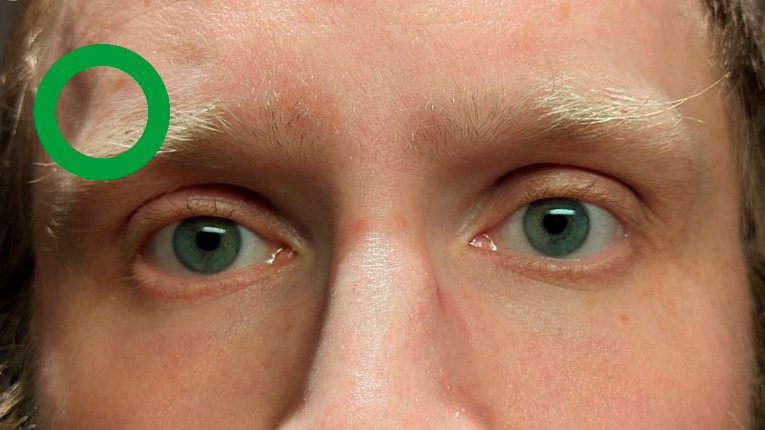
IMAGE 7 Correct image: comparison image of both eyes.